Setup PHP on Hiawatha Web Server on CentOS 7
In Part One of this article,we looked at how to install Hiawatha Webserver.In this tutorial, we will look at how to install PHP and integrate with Hiawatha web server so hiawatha can serve PHP files.
Our system on this tutorial was done is configured as follow:
IP Address : 192.168.234.160/24
Hostname : server.example.com
Operating system : CentOS 7
step 1: Setup
For PHP to work with Hiawatha,we’ll use PHP via FastCGI.First we install php-fpm.The Default PHP version on CentOS 7 is 5.4.16.However we want to use a newer version so we will install PHP 7.3 from the remi repo.
Install the remi repo by running the command below:
rpm -ivh http://rpms.remirepo.net/enterprise/remi-release-7.rpm
After repo is installed, run the command below to update the repositories on the system
yum repolist
Now lets install PHP 7.3 by running the command below:
yum install -y php73-php-fpm
This will install php-fpm and its basic modules.You can however run
yum search php73
to search for additional modules associated with the particular version of PHP and install when the need be.
Edit the configuration file
/etc/opt/remi/php73/php-fpm.d/www.conf
and do the following:
change
listen = 127.0.0.1:9000
to
listen = /run/php/php7.0-fpm.sock
(Make sure /run/php exist and its accessible by the nobody user and nobody group)
Locate the following parameters and update with the following:
user = nobody
group = nobody
listen.owner = nobody
listen.group = nobody
listen.mode = 0660
Please note that /etc/opt/remi/php73/php-fpm.d/www.conf is just an example configuration. You are adviced to use values that are best for your system and situation.
You can run the following commands to make the PHP available environment in the system environment.
ln -s /opt/remi/php73/root/usr/bin/php-cgi /usr/bin/php-cgi
ln -s /opt/remi/php73/root/usr/bin/php /usr/bin/php
When using PHP with Hiawatha, make sure you use the following PHP settings in php.ini
cgi.fix_pathinfo = 0
cgi.rfc2616_headers = 0
The following settings are not required, but recommended.
# Enable GZip content encoding
zlib.output_compression = On
zlib.output_compression_level = 6

# Security settings
expose_php = Off
display_errors = Off
register_globals = Off
magic_quotes_gpc = Off
allow_url_include = Off
Lets start php-fpm and enable it so its can persist reboot.
systemctl start php73-php-fpm
systemctl enable php73-php-fpm
step 2: Configuration
Lets now configure Hiawatha Web Server to integrate with PHP
Edit
/etc/hiawatha/hiawatha.conf
and make sure the following parameters matches the below:
ServerId = nobody:nobody
Hostname = 127.0.0.1
WebsiteRoot = /var/www/hiawatha
StartFile = index.php
AccessLogfile = /var/log/hiawatha/access.log
ErrorLogfile = /var/log/hiawatha/error.log
ExecuteCGI = yes
uncomment the following:
CGIhandler = /usr/bin/php-cgi:php
FastCGIserver {
        FastCGIid = PHP7
        ConnectTo = /run/php/php7.0-fpm.sock
        Extension = php
}
Make sure the /var/www/hiawatha directory is accessible by running the command below:
chown nobody:nobody -R /var/www/hiawatha
Now Restart hiawatha by running:
systemctl restart hiawatha
step 3: Testing
Create a test php file in the DocRoot – /var/www/hiawatha and test if hiawatha is able to serve PHP files.
In my case i created index.php with the following content
change permission by running:
chown nobody:nobody index.php
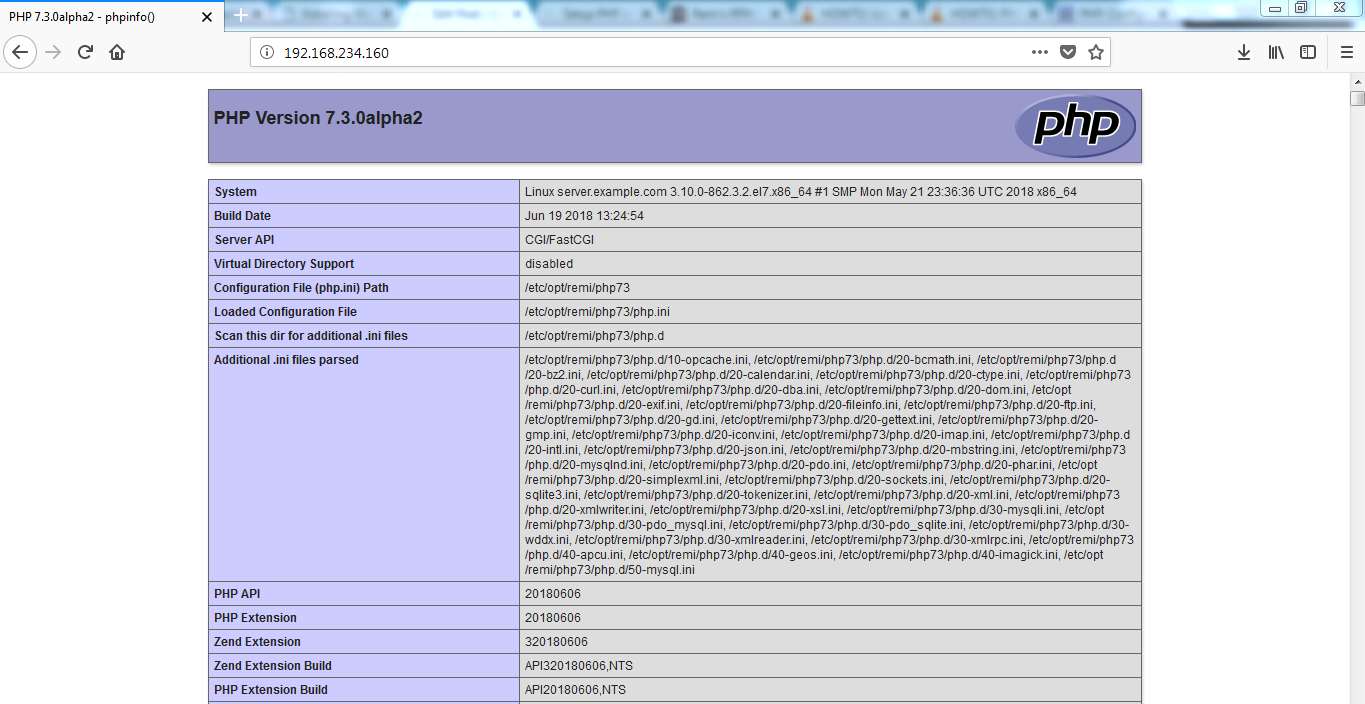
To view your newly created index.php page simply navigate to http://IPAddress/index.php or http://localhost/index.php on your browser(if testing on same machine).
Output Should be similar to the below.In my case because the hiawatha config file has StartFile = index.php,the server will read any available index.php file in the DocRoot.However no need to explicitly define the index.php file on the URL

Congratulations! PHP 7.3 is running on your Hiawatha Web Server.
References:
http://rpms.remirepo.net/
https://www.hiawatha-webserver.org
http://www.php.net/manual/en/install.fpm.configuration.php